How To Install Your Boar Hunter Fender KitUpdated 3 months ago
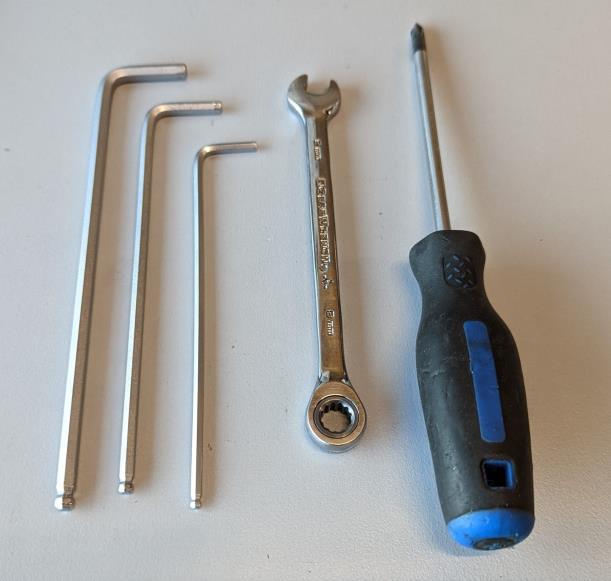
Tools needed:
⦁ 3mm Hex Key
⦁ 4mm Hex Key
⦁ 5mm Hex Key
⦁ Phillips Head Screwdriver
⦁ 8mm Wrench
*Instructions are shown when the rear wheel is removed. Make sure you remember the axle spacing, if not the torque sensor will not work properly.
Fender Kit:

(Rear Fender) Long machine screws are for the rear fenders.

(Rear Fender) Secure rear fender to the bottom of the bike frame. Use 4mm Hex and 8mm wrench.
(Bottom View)
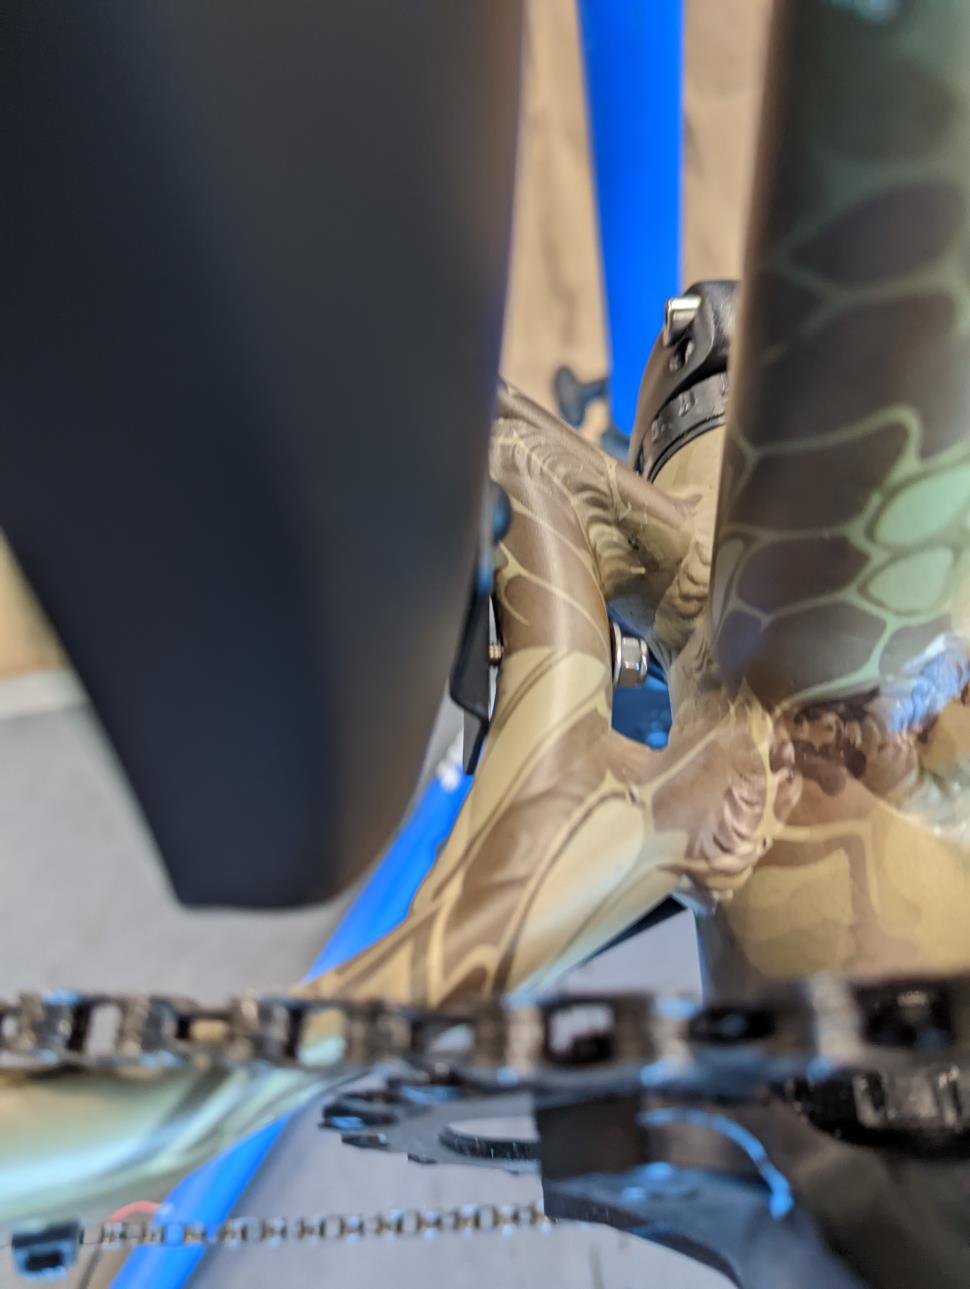
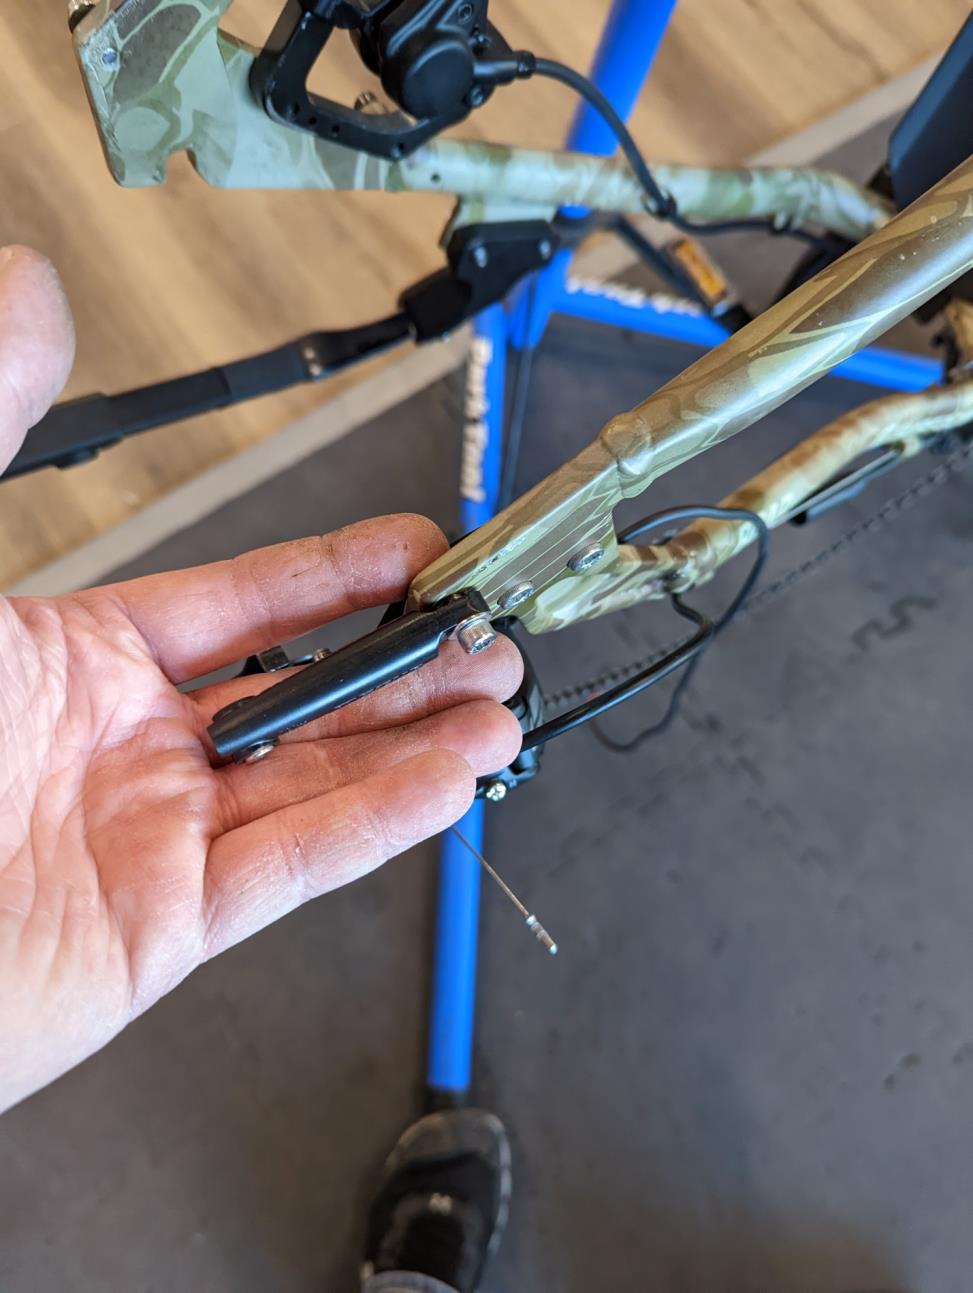
(Rear Fender) Secure stabilizer rod with the Phillips Head Screw and Lock Nut. Do both sides. (Use the shorter stabilizer rod)

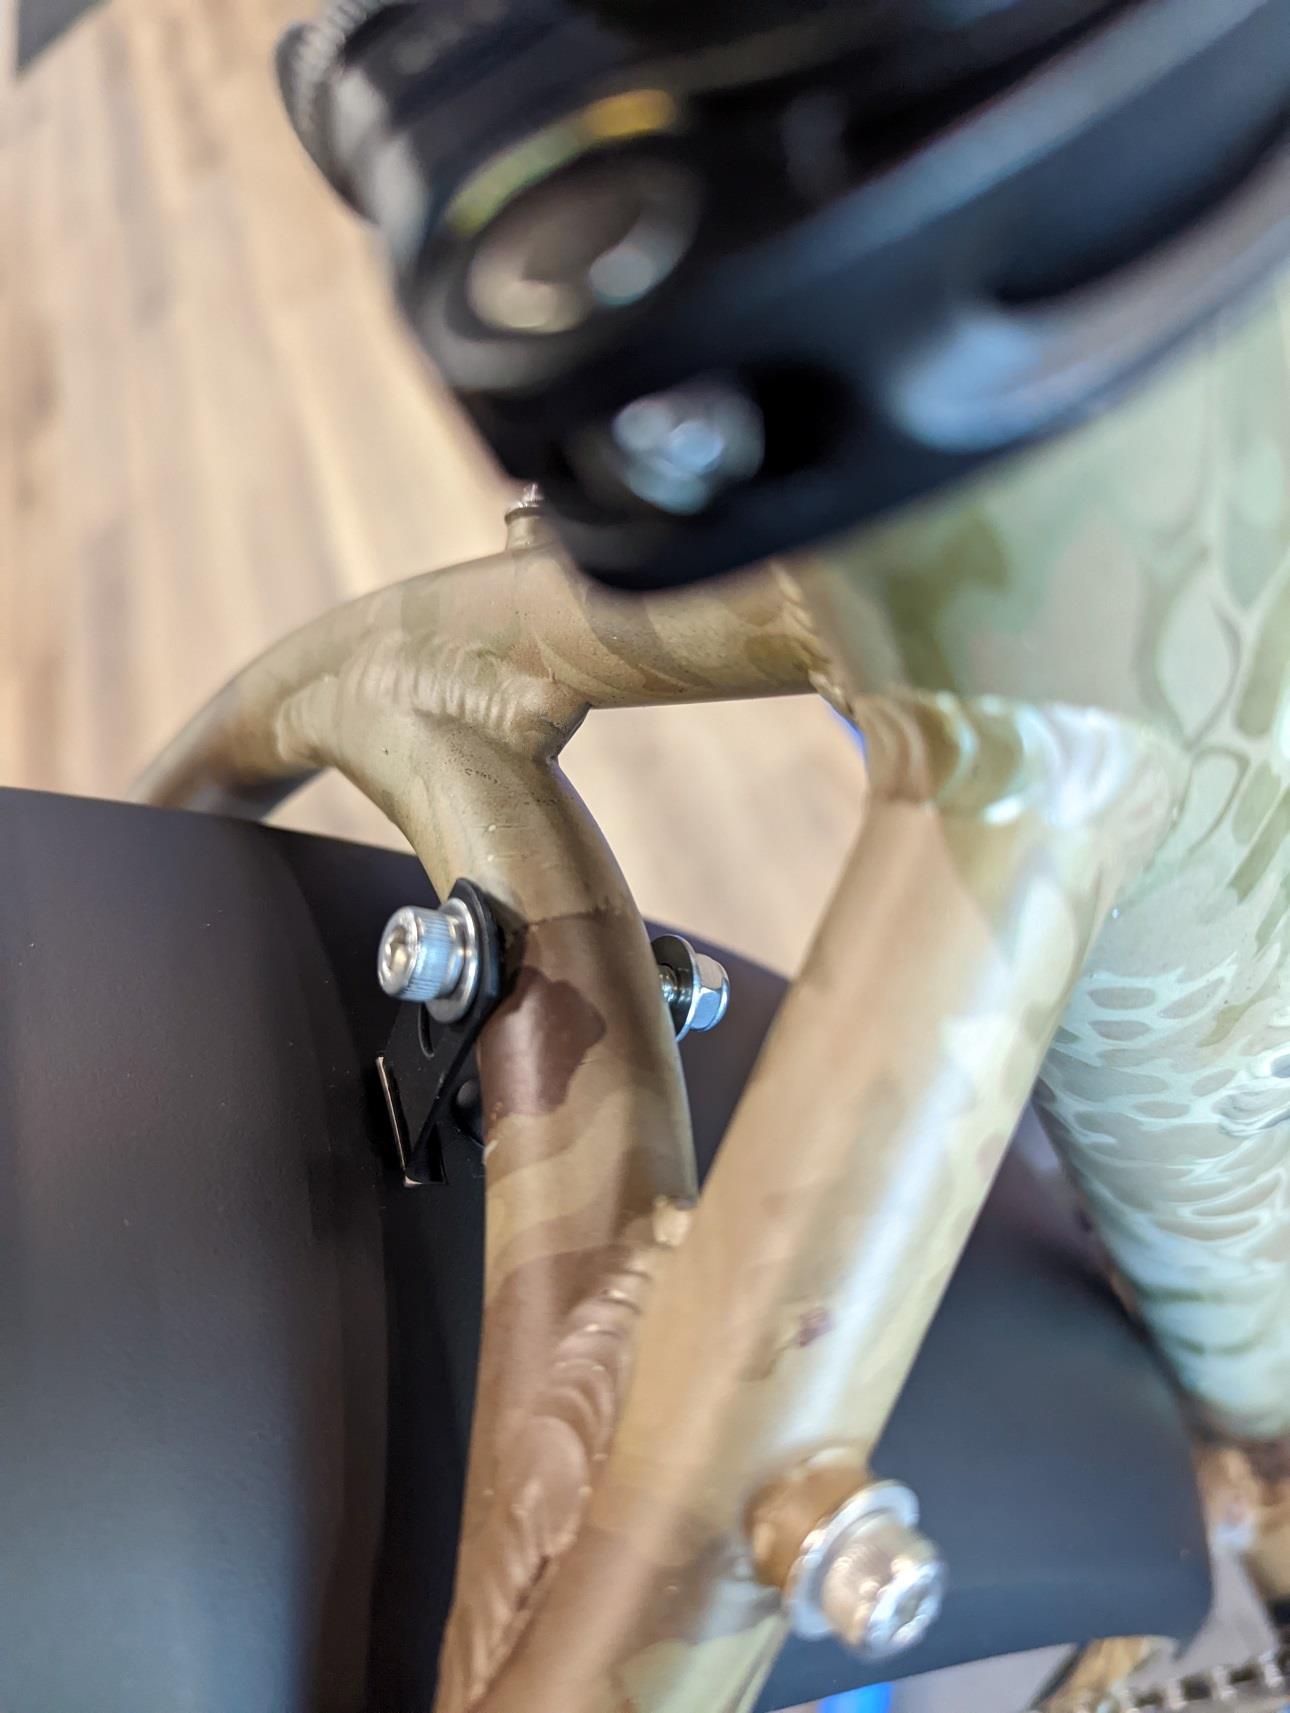
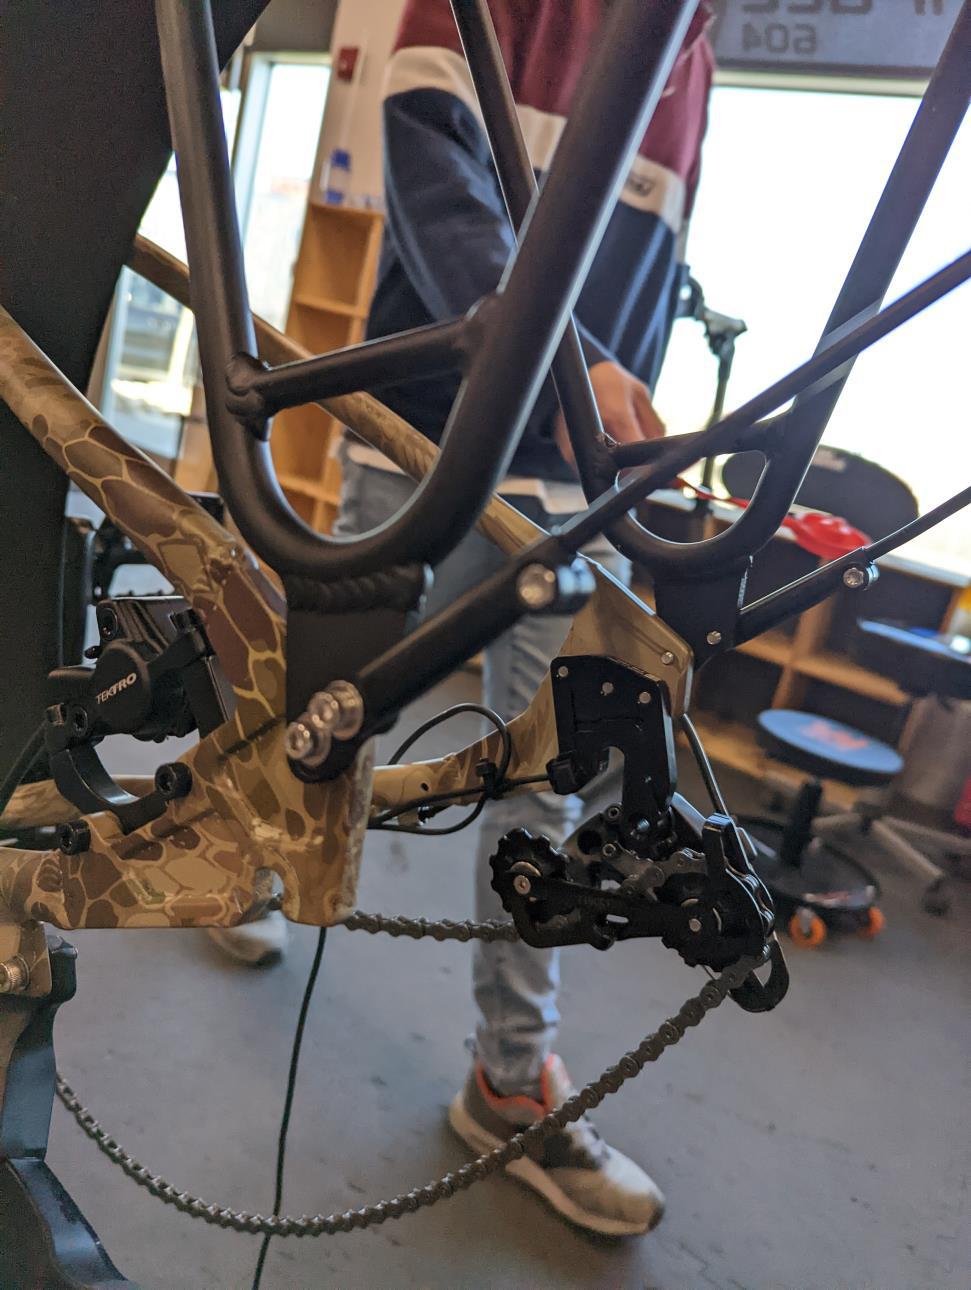
(Rear Fender) Secure the hardware to bike frame.
(NOTE: See Below if you have a rear rack installed)
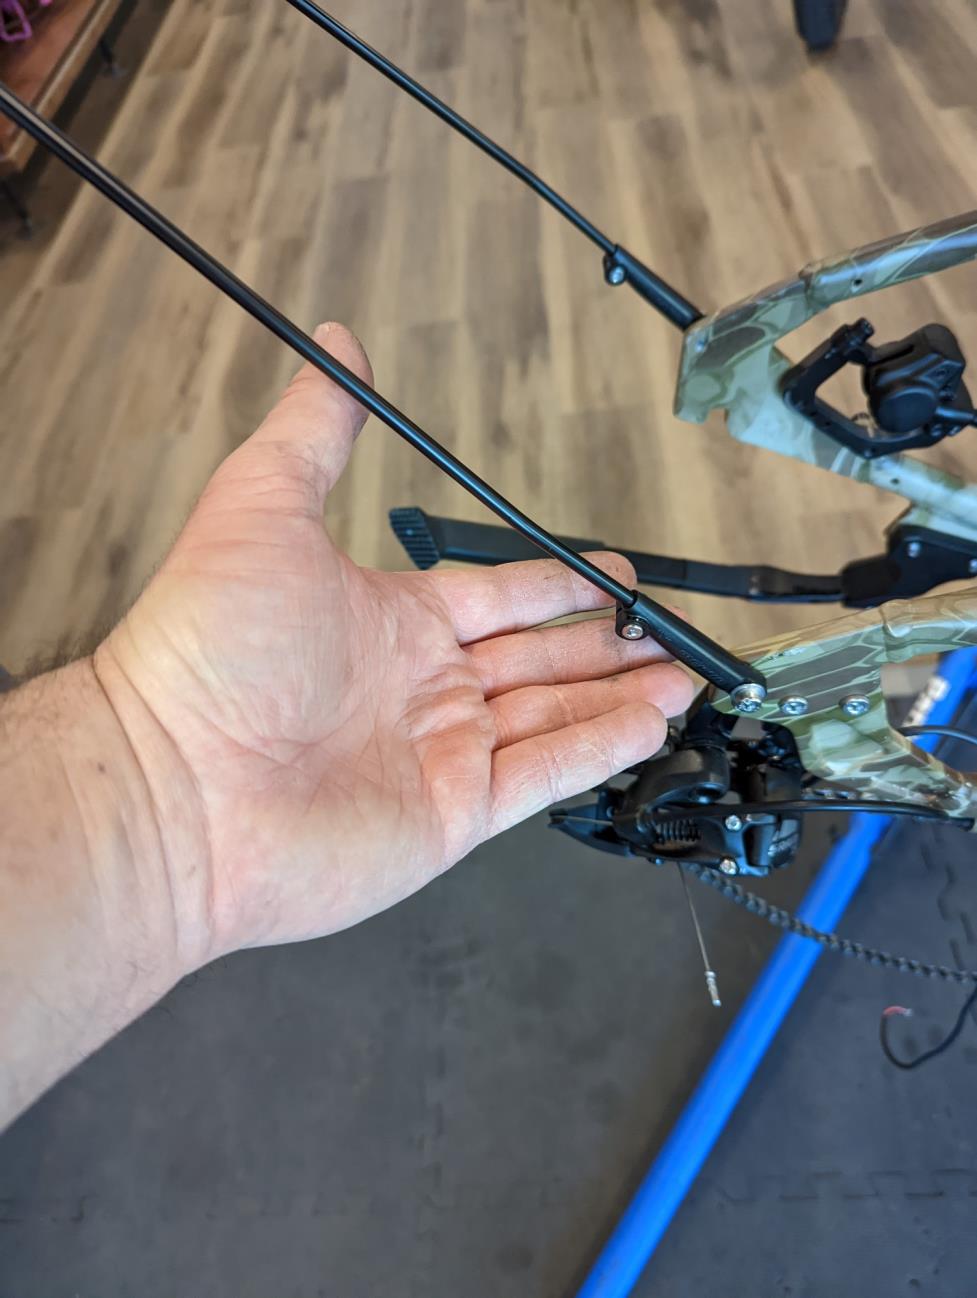
(Rear Fender) Insert stabilizer into the hardware and secure with 3mm hex key.
(Rear Fender) If you have a rear rack installed. There are holes for the fender at the bottom of the rack. Secure plastic hardware as shown.
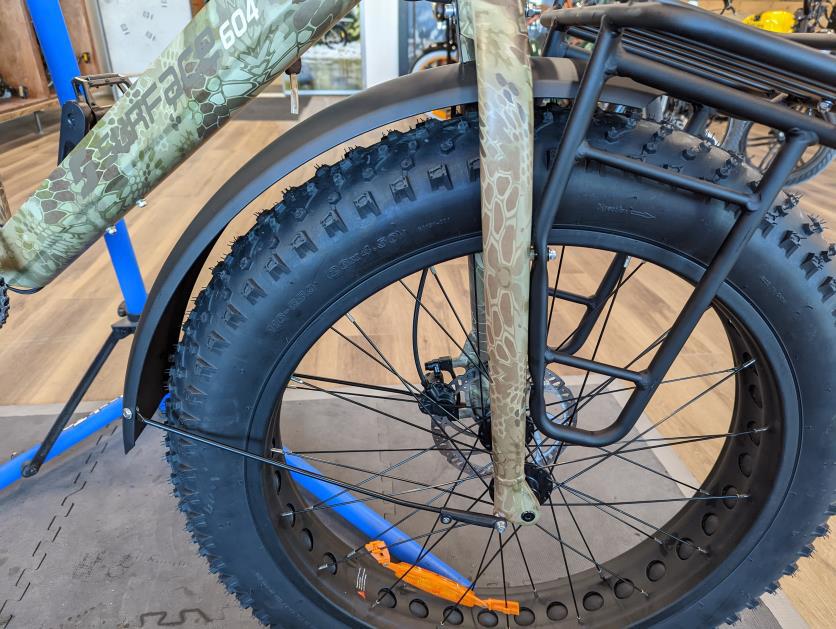
(Front Fender) Secure stabilizer rod with the Phillips Head Screw and Lock Nut. Do both sides. (Use longer stabilizer rod)

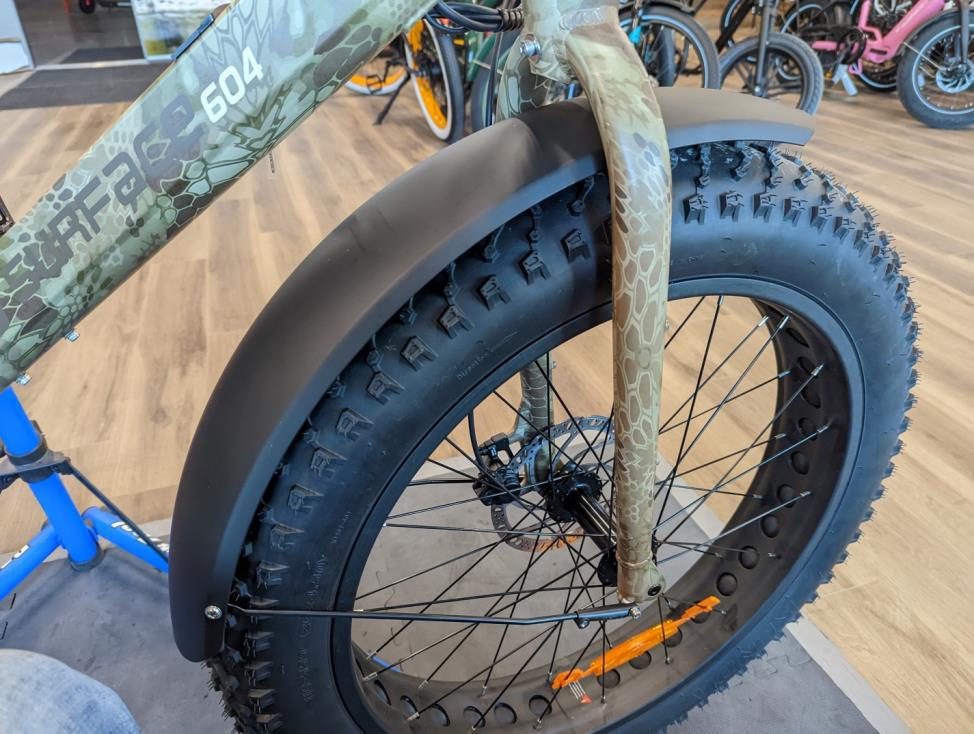
(Front Fender) Secure front fender to bike Fork. Use 5mm Hex and 8mm wrench.

(Front Fender) Use the metal shim and install plastic hardware to the bottom of the fork. Insert front fender stabilizer in the plastic hardware and secure it with the 3mm Hex Key.
Front Fender installation complete
(Front Fender) How the Front fender will look like with the front rack installed.
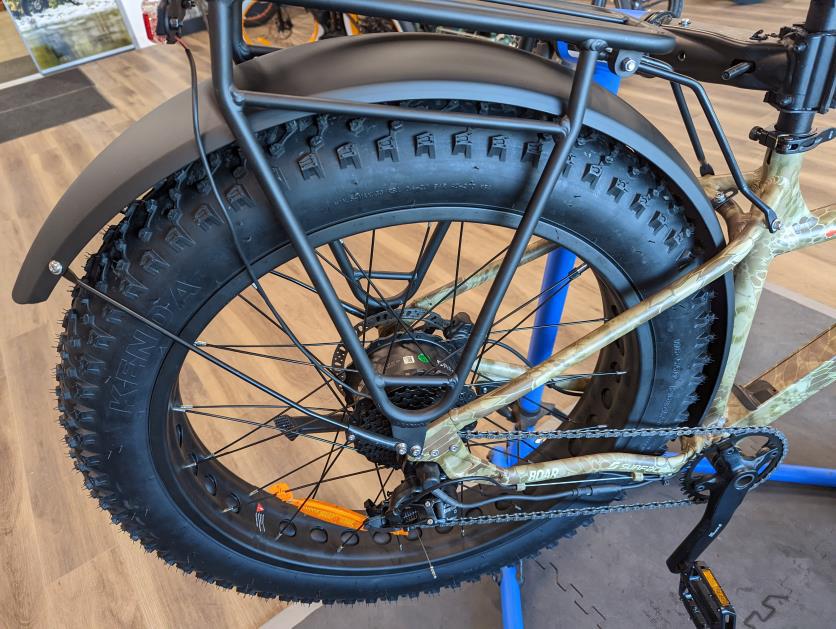
(Rear Fender) How the rear fender will look like with the rear rack installed.